A smooth and reliable internet experience is guaranteed when you connect your MacBook—whether it’s a MacBook Pro, MacBook Air, or the most recent MacBook Air M2—to a Netgear Orbi router. The Orbi system is a great option for both residential and workplace settings because of its wide Wi-Fi coverage and well-known mesh networking features. This thorough tutorial will explain how to connect orbi router to macbook, cover any obstacles that may arise, and offer fixes for typical connectivity problems.
Comprehending the Orbi System
The Orbi mesh Wi-Fi system from Netgear was created to remove dead zones and offer reliable internet access across wide distances. Strong Wi-Fi signals are spread across your area by a central router and one or more satellite devices.
For multi-story residences or workplaces with intricate layouts, where conventional routers can find it difficult to offer sufficient coverage, this method is very advantageous.
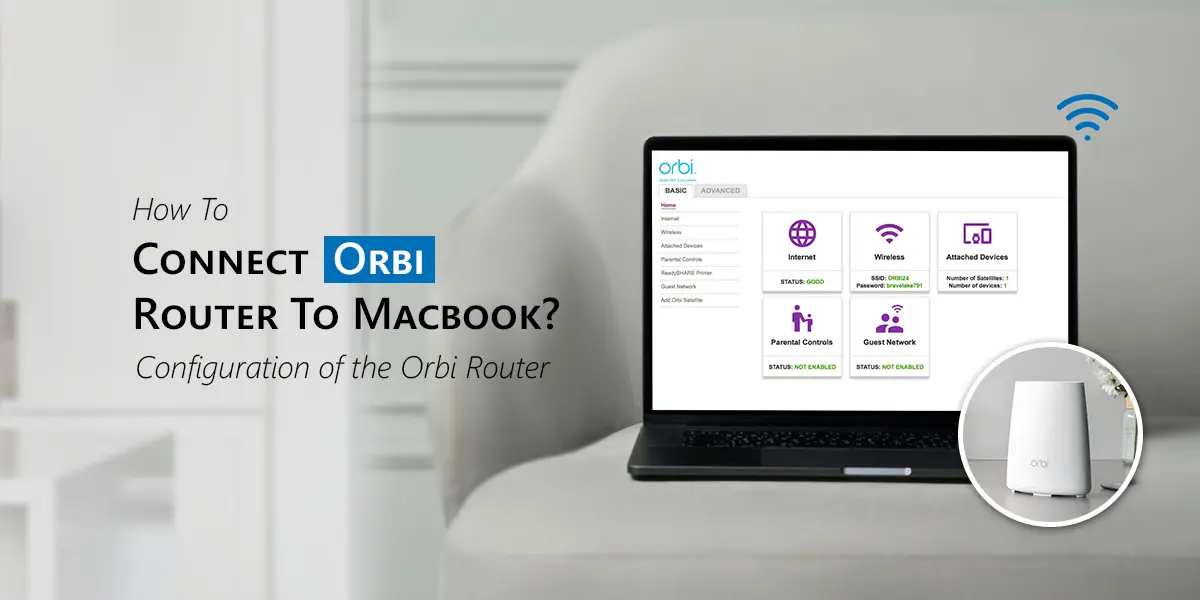
Configuration of the Orbi Router
It’s crucial to properly configure the router before connecting your MacBook to the Orbi network:
Unpack and Set Up the Router:
- Put the Orbi router in the middle of the room, away from any obstacles or electronics that could interfere.
- To turn on the router, use the included adapter to link it to a power basis. When the router is ready for configuration, wait for the LED light to turn completely white.
Connect to the Modem:
- Attach the Orbi router to modem using an Ethernet. To enable a steady internet connection, make sure the connection is secure.
Connect orbi router to MacBook
- You may use either a wired (Ethernet) or wireless (Wi-Fi) connection to connect your MacBook after configuring the Orbi router.
Ethernet Wired Connection:
- Find the Ethernet Port: The majority of MacBook Pro models have an Ethernet port. However, a USB-C to Ethernet converter could be necessary for MacBook Air models, particularly the more recent M2 variants.
- Link the Ethernet by beavering one end into the adapter or your MacBook and the other end into the Orbi router.
Set up the network settings:
- Go to System Preferences > Network on your MacBook.From the selection on the left, choose Ethernet.Make sure that DHCP is selected in the IPv4 configuration.
- To save any modifications, click Apply.
Check for a Connection:
- To make sure your MacBook is online, use a web browser and go to any website.
Wi-Fi, or wireless connection:
Go to the Wi-Fi Settings to connect orbi router to macbook:
- On your MacBook, click the Wi-Fi icon in the menu bar in the upper right corner.
- Make sure Wi-Fi is activated.
Link up with the Orbi Network:
- Choose the network name (SSID) linked to your Orbi router from the list of reachable networks. Usually, the router has a label with this information on it. When asked, enter the Wi-Fi password.
Verify the Relationship:
- The Wi-Fi symbol will show the signal strength once connected. To confirm that you have internet connectivity, launch a web browser.
Enhancing Wi-Fi Efficiency:
When connect orbi router to macbook pro, follow these steps to guarantee optimal performance:
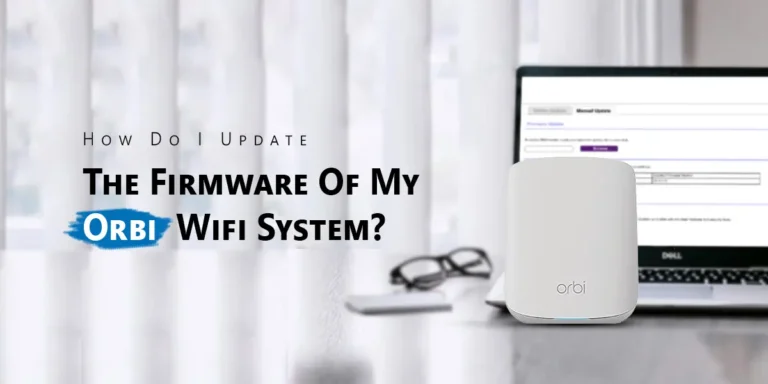
- Update Firmware: Make sure to often check for firmware upgrades for the connect orbi router to macbook air. Apprises are released by manufacturers to improve security and performance.
- Positioning: Arrange the satellites and Orbi router so that they cover every location where your MacBook is used. Keep them away from electric equipment or thick walls that might inhibit with them.
- Network Settings: Type “http://orbilogin com” into your web browser to access the Orbi’s online interface. To improve performance, you may adjust parameters like channel selection and security measures here.
Solving Typical Connectivity Problems
Even if you follow the setup instructions, you may still experience problems with connectivity. Here are a few typical issues and how to fix them:
Orbi Network Not Connecting to the MacBook:
- Verify the Wi-Fi settings: Make sure your MacBook is trying to connect to the right network and that Wi-Fi is turned on.
- Device restarts: Both the Orbi router and the MacBook should be powered cycled. Connectivity problems may frequently be fixed with this one approach.
- Aside and Re-Connect: Go to System Preferences > Network > Wi-Fi > Advanced on your MacBook. Click Remove after finding and selecting your Orbi network. After that, choose the network from the WiFi list and put the keyword to rejoin.
Periodic Failures to Connect:
- Interference: Make sure the router is positioned away from electronics like microwaves and cordless phones that could interfere with it.
- Firmware Updates: Connectivity problems may arise from outdated firmware. Update the firmware on your Orbi router and the operating system on your MacBook on a regular basis.
Internet speeds that are slow:
- Bandwidth Allocation: Your network may experience stress if several devices are streaming or downloading big files. To keep an eye on device usage and adjust bandwidth appropriately, use the Orbi app.
- Interference in the Channel: To switch the Wi-Fi channel, go to the Orbi’s web interface. Interference on the same channel can occasionally be caused by nearby networks.
Problems with connect orbi router to macbook pro:
- 6GHz Wi-Fi Band: Wi-Fi 6E, which uses the 6GHz band, is compatible with the MacBook Air M2. Make sure this band is supported by your Orbi router as well. If not, the 2.4GHz or 5GHz bands will be used by the MacBook by default.
- Driver Updates: To enhance hardware compatibility, Apple provides updates on a regular basis.
Final Thoughts
Whether you have a MacBook Pro, MacBook Air, or MacBook Air M2, connect orbi router to macbook is simple if you follow the right instructions. Optimizing your router’s location and configuration may greatly improve performance, regardless of whether you use a wired or wireless connection. A smooth and fast internet experience may be guaranteed by resolving frequent problems and updating your firmware.
FAQs
Why is my MacBook not connecting to the Orbi router?
Incorrect Wi-Fi settings, out-of-date network drivers, or interference might be the cause of your MacBook’s inability to connect. Check for firmware elevations, start again both devices, and disconnect and rejoin to the Wi-Fi. Make sure the MacBook isn’t preventing the connection and that Orbi’s DHCP settings are enabled.
Can I connect my MacBook to the Orbi router using an Ethernet cable?
Yes, you may use an Ethernet to link your MacBook to Orbi. However, if your MacBook does not have an Ethernet connector, you might require a USB-C to Ethernet converter. Compared to Wi-Fi, direct wired connections may offer a faster and more consistent internet connection.
Is there a specific browser recommended for setting up Orbi on MacBook?
The best browsers for Orbi web-based setup are Google Chrome, Safari, or Firefox. If there are setup problems, make sure your browser is up to date, turn off any extraneous extensions, and clear your cache. Another practical choice for controlling your WiFi settings on a MacBook is the Orbi app.
How do I update the Orbi router firmware using my MacBook?
To update the firmware, go to the “Firmware Update“ section under Advanced settings, log in to the Orbi online interface at orbilogin.com, and look for any available updates. If necessary, download and install updates, then start again the router for the adjustments to take effect.
Why is my Orbi router showing no internet on my MacBook?
Restart both devices and check the modem’s connection if your Orbi router isn’t seeing internet. Reset your MacBook’s network settings, make sure the ISP service is operational, and confirm that Orbi is in router mode. Persistent problems may be fixed with a Orbi factory reset or firmware upgrade.
How do I change Orbi WiFi settings from my MacBook?
Go to orbilogin.com in a browser, enter your admin credentials, and select Wireless Settings from the Basic or Advanced settings to modify Orbi WiFi settings from your MacBook. Change the security type, password, or SSID, then save your settings. If necessary, reconnect devices to the new WiFi network.